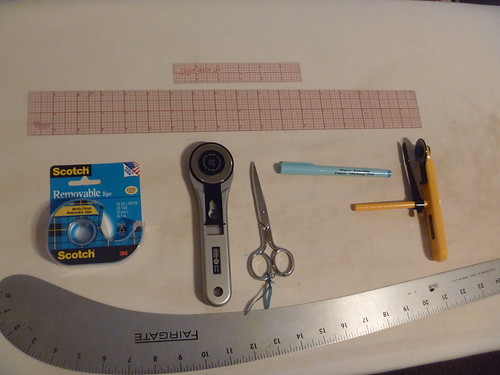
Below are my favorite tracing and for lack of a better term "project prep tools". The one thing that is not included in the picture is a huge role of tracing paper about 24 1/5 inches wide. For most projects, the simple tracing paper works fabulously and is easy to see through.
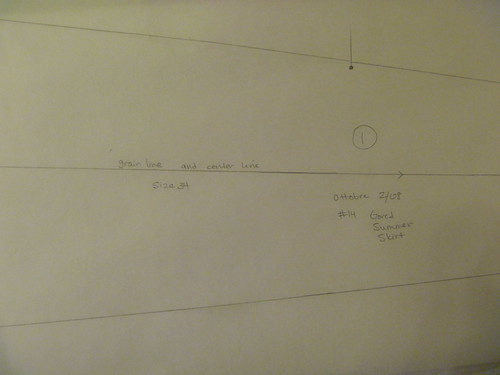
Using the Ottobre patterns, the sheet letter and color are identified in the directions. Numbers along the bottom of the sheet in the desired color mark the location of the pieces on the sheet. I reference the directions a lot to match the shape of the piece I am tracing.
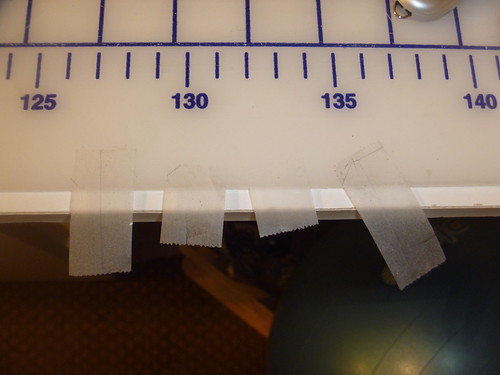
Once I locate the pattern piece, I cover it with the tracing paper. Because I am miserly, I am careful about where I locate the tracing paper to save room for other pattern pieces thereby conserving tracing paper. WATCH OUT when you do this so that you preserve enough space between pattern pieces for the seam allowance (x2) or any miserly attempts are lost.
Notice the blue Scotch tape. If you have never used Removable Scotch Tape before prepare yourself because it is dreamy. I am once again a conservationalist and use pieces over and over again. (Because small pieces of tape line my studio, they tend to stick to my clothes when I don't realize it. The hitch-hikers have found their way to my office where I now have a small stash of removeable tape.)

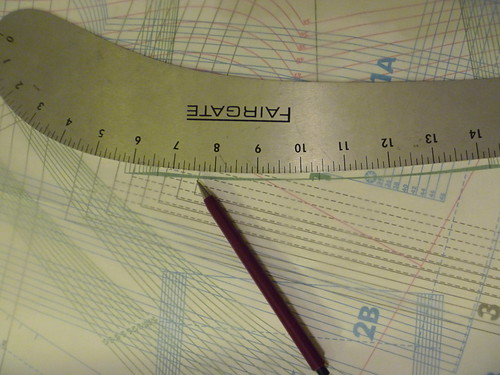
When tracing straight lines I use the straight edge clear ruler. This helps me follow the line of the size I am tracing. Because most lines are actually curved, I couldn't live without my French curve.
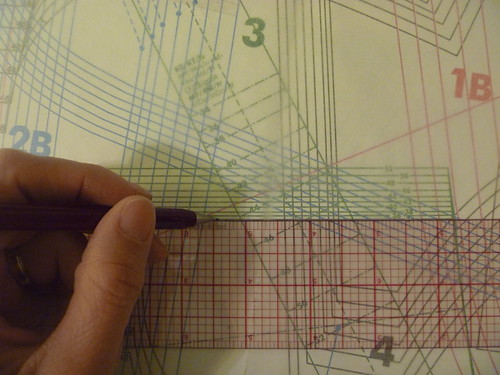
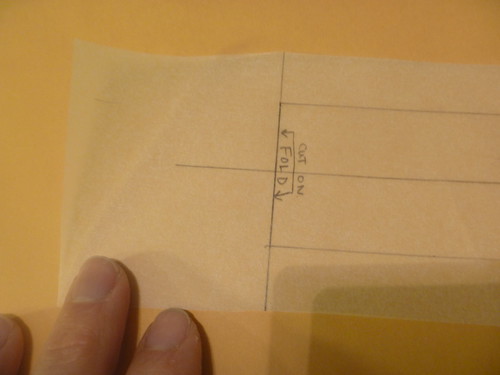
Every pattern piece has a grain line. Do not untape the tracing paper until the grain line is traced (with the straight ruler). Check the magazine or directions for any other marks on the pattern piece before removing the removable tape. Marks that show as tics I trace with a ruler extending through the seam allowance (even though the seam allowance isn't marked yet). Pattern pieces that are cut on the fold, I leave an extra inch or two of paper extending past the fold line. This way when I cut the fabric, I can accurately place the fold line and weight it.
Generally, I trace all of the pieces, label them, then use the most amazing tool (Removable Rotary Guide Arm [RRGA])- to cut the pieces out with the seam allowance. (The only place that I have found this tool - RRGA - for sale is at Charlie's E-Z Mat Cutters http://www.matandquiltcutters.com/). Previously, I measured the seam allowance every inch or two with the small clear ruler then connected the dots using the curved ruler.
Depending on what I am sewing, the fabric etc... I vary the seam width. If I am sewing woven fabric for an adult, I use a 5/8" seam allowance. If I am sewing for a young person (less than 5), I will often use a 3/8" seam allowance. I have started to keep samples on my peg board of swatches with different seam allowances. This makes adjusting the seam allowance with the RRGA easier especially when I am sewing seams on the serger.
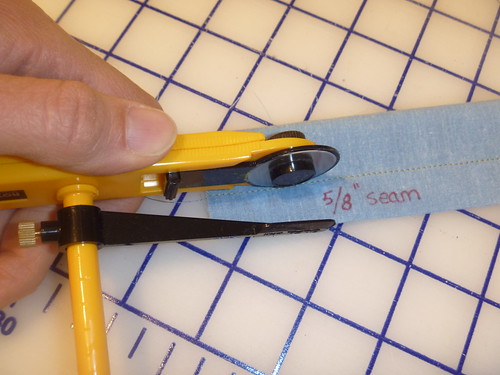
Once I have the seam allowance set on the RRGA, I place the black arm on my pencil line and the blade on the outside of the pattern piece to cut the paper.
Please let me know if you have any questions or something doesn't make sense. Hopefully, I can clear it up.
I missed these because I'm away from regular internet, but I'm so excited to get back and try them out. This seems like it would make a lot more sense that the haphazard approach I've been attempting. Thanks Moni.
ReplyDelete