Thursday, July 7, 2011

We have this room

We have this room in our house, in the basement, with no windows. Technically, we call it "the laundry room," but that just doesn't convey the value that we place on this room. My husband is afraid of messiness. That includes water in places other than a sink or tub, paint, and various forms of art craftiness performed by me or our four year old son who shares this space with us, with less than equal terms (in his favor). Did I mention that this room has a large, deep laundry sink?

This room has fluorescent orange paint on the wall near the not so newly acquired, hand me down metal cupboard that is just the right height for a young person to stand and paint for hours. I commandeered some space in this room after bedtime this evening. I even enlisted my husband to help me make a fantastic mess in this room. I am thrilled with the outcome of my first attempt at silk screen printing. It came out far nicer than I was expecting. I might have gone a little nuts. Now I need to learn a little about aesthetics and printing. Maybe I should even plan the prints on garments, but we'll see how these come out in the end. Luckily, they are still practice. Does anybody else take on these kinds of projects- where there is an uncertain end?

G's Bday 039

G's Bday 034

Back to the room. Does anybody else have a special room like this? A room that at first glance seems completely unfinished and utilitarian but turns out to be one of the most covetous spaces in the whole house?

Wednesday, June 29, 2011

I have been sewing, really

Springing into summer feels great! I can't keep up with all of the projects that I have on going AND get enough out of doors time. I really did finish my Summer Gore Skirt and love wearing it. It simply feels pretty. The crisp Anna Maria Horner voile is the nicest feeling summer fabric ever. It takes longer to warm the iron up than to press it (for work). The top-stitched French seams make it even easier to press. My niece made one when I was doing the posts. It came out fantastic, but I don't have a good pictue of the skirt to post. She picked out a blue and black tiger striped fabric with black trim, which was perfect for the pattern.

gore skirt

lining

I also made a quick Ottobre T-shirt with a zebra applique, which was painted with freezer paper stencil by the wearer (a just less than 4 year old). I couldn't resist all the black and white stripes.

zebra

I have been skiing as much as possible. Pretty amazing as it is near the end of June.

008

012

I am preparing for my Ottobre meets Alabama Chanin (modified) test project(s). As long as I keep them test projects, I can still call them a success even if the product becomes a "wadder".

030

I have never prepared a silk screen for printing. I'll let you know how this comes out (uhmmmm maybe). I can't wait for a test print run, but need the time absent help from an almost 4 year old. I remember watching my dad do this sort of a thing when I was around 10 or so.


Oddly enough, when I was young, I did a lot of hand embroidery. I didn't enjoy it very much. I have been teaching myself how to do some hand embroidery via the Alabama Chanin Studio Style book and am enjoying it.

033


If you haven't seen what can happen to simple jersey fabric via Alabama Chanin style, you should check it out. It is amazing. My sample doesn't compare.

www.alabamachanin.com

In addition, I have been driving myself crazy making a couple (why did I decide to make two?) large baby blankets. I thought it would be great to quilt it with the same shapes that are in the printed fabric. Am I nuts? One is done, but the other still needs to be quilted and bound.

028

quilting

Monday, May 16, 2011

The Invisible Zipper

I think that the invisible zipper is the easiest zipper installation of all styles of zippers. The key to a nice looking invisible zipper is basting and an invisible zipper foot.

I usually wash and dry all of my zippers before installing them. This keeps them from shrinking after they are installed. You can prepare them with steam and an iron too. For the invisible zipper, I also press the zipper crease open so that it moves through the invisible zipper foot easier.

pressing open

I mark the seam line where the invisible zipper goes with water soluable marker.

marking seamline

Then I pin the teeth of the zipper so that they are right on the seam line followed by basting.

placing

The top of the zipper should go just below the waist band seam. Try to keep the zipper stop just below the seam line so that you don't break your needle. When you sew this on, carefully back-stitch within the seam allowance.

I mark on the zipper tape where I will back-stitch on both sides of the seam where the zipper will stop in the side seam. (Although this picture doesn't show the marking exactly, I will try to replace the picture next time I install an invisible zipper.) This needs to be located at a minimum where the zipper foot will not pass because of the zipper slide. Sometimes it is easier to just sew the first side and then mark the second side to match the first if you aren't too picky. Regardless, the end of the stitching should be at the same place on both sides of the zipper. If you want a shorter zipper, then mark where you want the zipper slide to end and back-stitch at that location. You can use heavy thread to tie off the zipper and cut it off below the back stitching after the zipper is installed.

basting and marking

invisible zipper foot

On the second side, I also mark the seam allowance and pin the teeth of the zipper right on the seam allowance. Baste. Check to make sure that when the zipper is closed the fabric pieces are at the same level. This may rerquire pulling the basting thread and re-pinning and basting. Check it a few times because re-basting is much easier than picking sewing machine stitching out of the crease of the zipper. When the top of fabric pieces are even with the zipper closed, go ahead and sew the zipper as the first side.

This is a picture of what the wrong side looks like.

wrong side

The next step is a little tricky. Put the right sides of the fabric pieces together and work the area of the seam and seam allowance in such a way that the raw edges come together and the zipper is out of the way. It takes a little fidgeting, but completely possible. Pin the side seams to make sure that the hem is even. To sew the seam below the zipper, sew in the direction from the zipper to the hem (away from the zipper). At times I can back into the end of the zipper stitching (sewing in the reverse direction)starting an inch below the zipper stitiching and sometimes it works just going forward and back-stitching at the beginning of the seam. Below is the finished zipper and side seam. A few hand stitches are sometimes required to close the gap between the back-stithing of the zipper and the backtitching of the side seam.

invisible zipper 009

Monday, May 2, 2011

Finishing the seam allowance

The Summer Gore Skirt has straight seams for each of the gore panels. Although the directions call for a lining, depending on the fabric that you chose, you may not need to line it. If you do line it, you may want to use rayon or silk for the lining if you plan on wearing hose or tights with it. Otherwise cotton or no lining is fine. If the skirt will be wash and wear, I recommend finishing the seams even if it is lined.

Without a serger, you could finish the seam with a zig-zag stitch, triple zig-zag, or a French seam if the fabric is not too heavy. You may need to try a few different ways to see what works best with your choice of fabric.

I have a foot that keeps the thread from pulling the end of the fabric, which is pretty handy for over edge seam finishing.

Foot


French Seams
Sewing French seams leaves a very clean finish on the inside of the garment. 1) With wrong sides together sew a 3/8" seam. 2) Trim half of the seam allowance to 3/16". This may seem difficult, but with a little patience and practice, it is pretty easy to cut away half of the seam allowance.

Trim half of seam allowance

3) Press the seam open.

Press trimmed seam open

4) Turn the fabric right sides together and press the seam closed.

Final press

5) Stitch the seam at 1/4".

1/4" seam

Finished inside of garment with French seams (pressed and ready to topstitch).

Inside garment with French seam

Sunday, May 1, 2011

Cutting the fabric

Sometimes when I am asked what I am doing, and my response is "sewing," I laugh. More time is spent preparing to sew; tracing, cutting and pressing, the actual time spent at the sewing machine is minimal.

If I am using a pattern that has been folded, I prepare it by pressing with a medium to low temperature DRY iron. Enough heat to flatten the pattern, but not enough heat to burn it.  I do not use steam or the pattern will deform. Take care if there is tape holding the pattern together and keep the iron away from the tape.

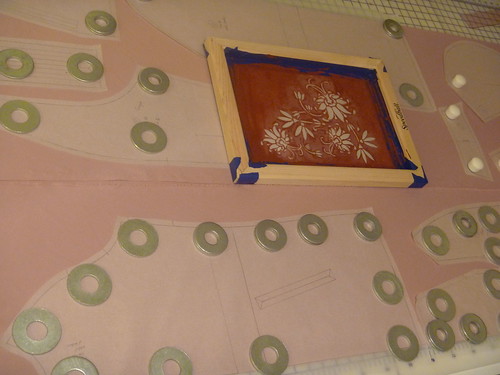
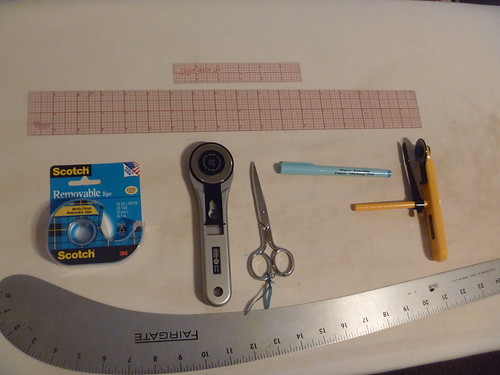
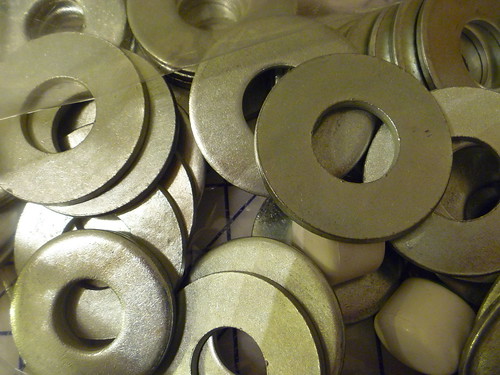
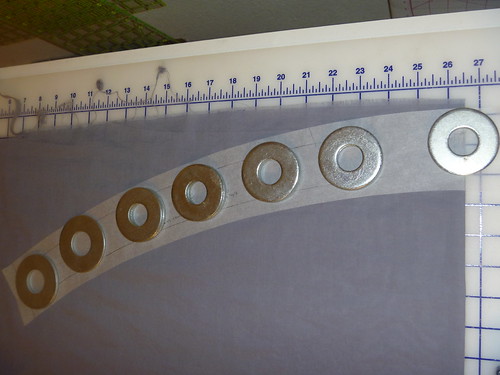
When cutting the fabric, I make it as simple and easy as possible for myself. I use weights and rotary cutters. Fabric cutting weights are fairly expensive when purchased at a sewing shop, and I use a lot of them. I use zinc coated (galvenized) washers instead of the cutting weights. I washed them after I purchased the box or two (probably in the dishwasher to my husband's dismay). The smaller weights I glued together with epoxy, which may or may not be necessary. I rarely pin the pattern to the fabric, and when I do, I place the pins along the bias of the fabric (45 degrees to the grain) to minimize fabric distortion. Note: steel washers without the zinc coating will oxidize and leave black smears on your fabric.

Washers

Depending on the type of fabric my prep is different. I do not iron knits. Ironing knits distorts and stretches the fabric. I iron wovens prior to cutting. If I am cutting prints, especially large prints, I may cut each piece separately so I can place the print where I want it on the pattern piece. In this case, I trace the print or part of the print on the pattern piece to match prints or place the print in an attractive location. If not trying to match prints, I will fold the fabric on the grain.

Finding true grain of fabric can be tricky. There are definitely different grades of fabric. Sometimes I think the looms may get off kilter and the fabric may not be woven square (the warp and the weft threads are not at right angles). If the weave is too out of square, there is nothing that can be done. You may not want to use that piece of fabric, or use it in a garment that is loose so that the grain may not affect it as much. Some people try to stretch the fabric and square it up, but generally, the fabric will return to its previous state and you end up with a strange fitting or hanging garment anyway.

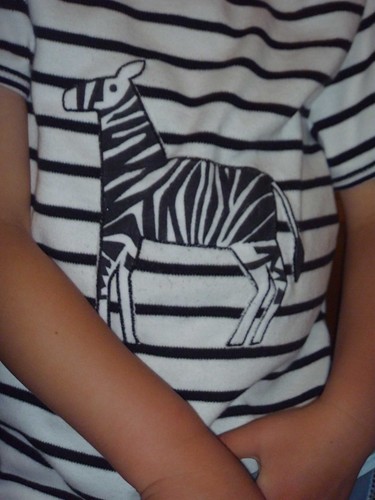
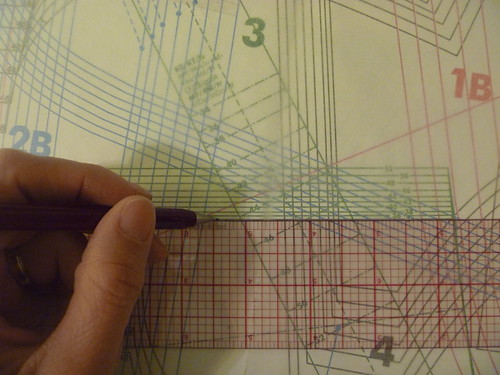
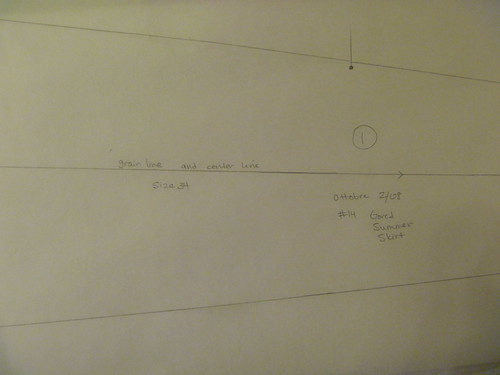
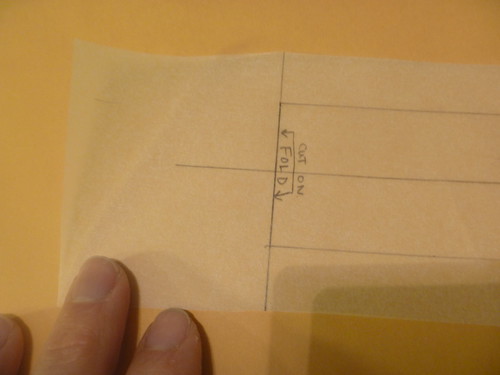
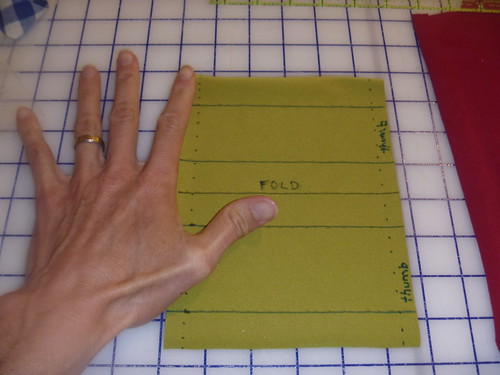
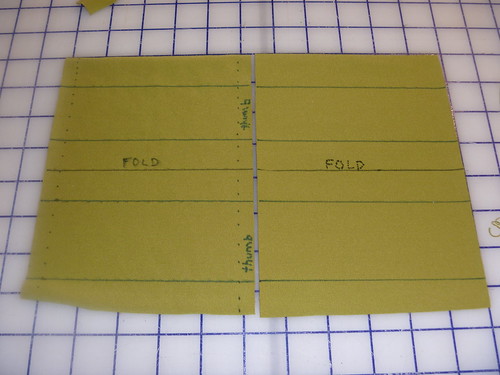
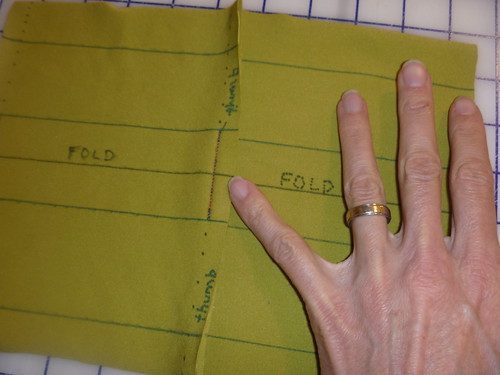
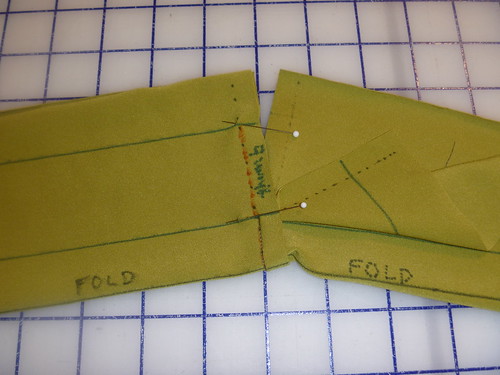
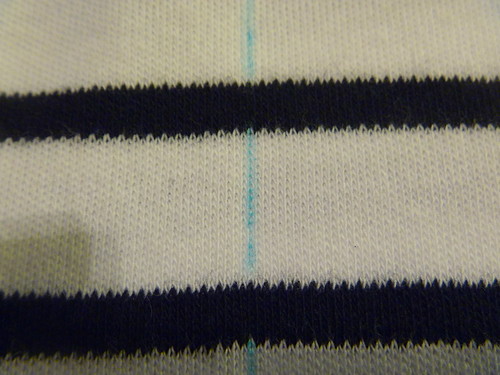
To find the grain on a knit fabric, whether it is Jersey knit, double knit, or interlock, I will find a line of knits and trace it on the location where I will be folding it (or near the fold) to cut it out. This takes a little bit of time, but keeps T-shirts and leggings from twisting around arms, legs and torsos.

Finding grain on knits

Stable woven fabrics can often be put on true grain by placing the selvages together and laying it out on a cutting grid. If there are wrinkles in the fabric, it is not on grain and you will have to slide the top layer of fabric one way or the other along the selvage until it lies flat. If it doesn't seem to be working well, on the cross grain either rip the fabric or pull a thread to line up the cross grain (weft) threads. This should help get the selvages to line up. Unstable fabrics like silk or rayon, I generally have to line up the weft threads on the end because the fabric will lie flat even when it isn't trued up. Twill fabrics are luckily stable. Usually ripping or pulling a weft threads is nearly impossible for me and the weave makes it very difficult to follow a weft thread.

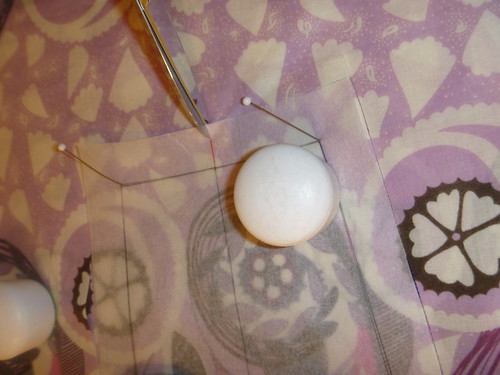
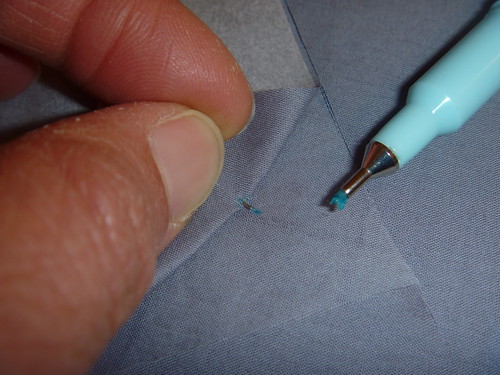
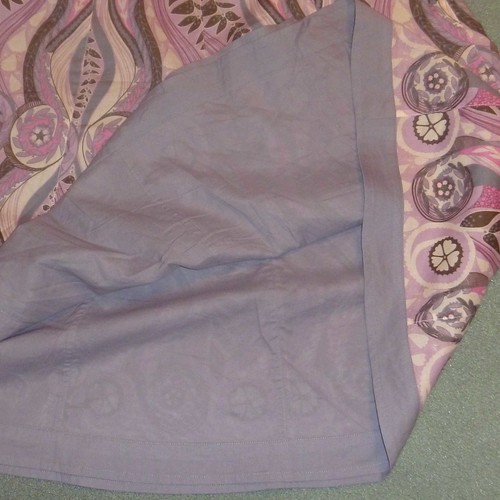
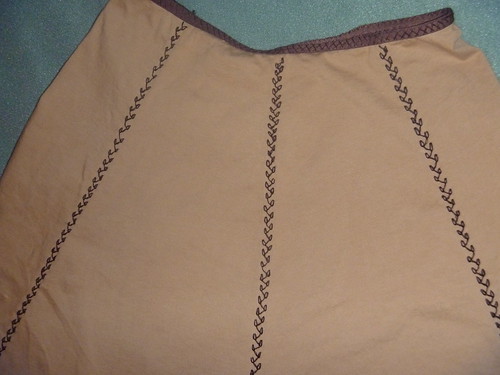
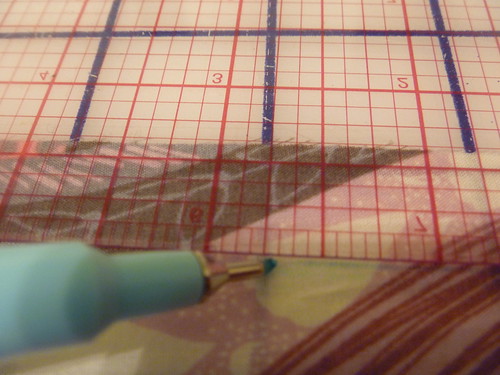
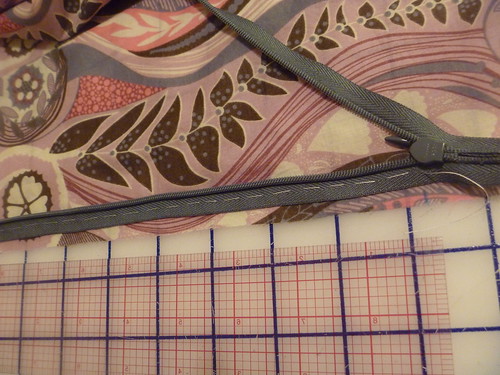
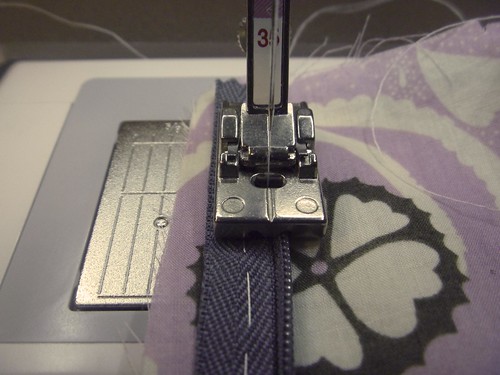
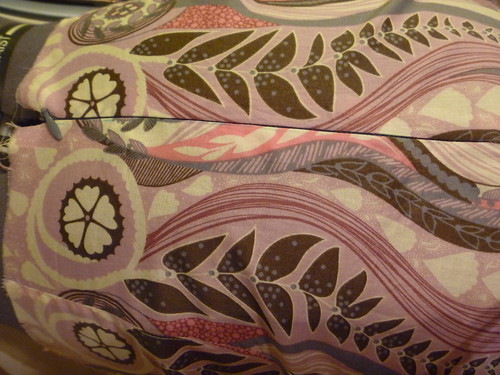
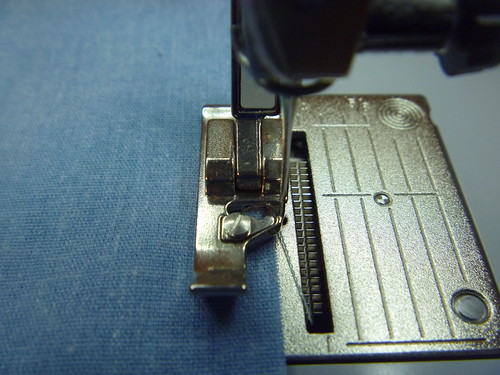
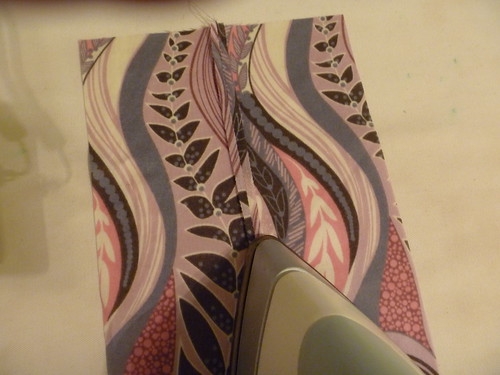
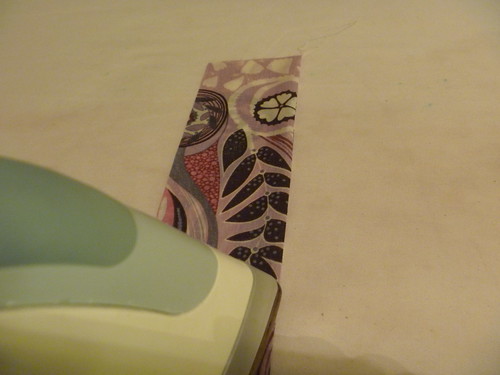
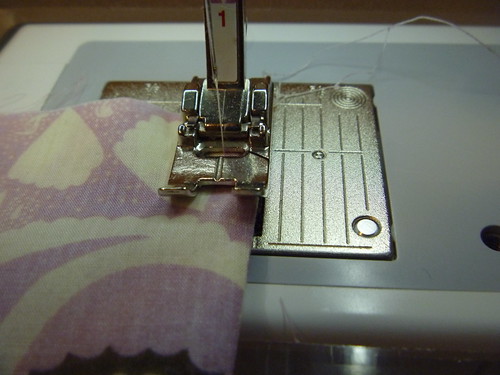
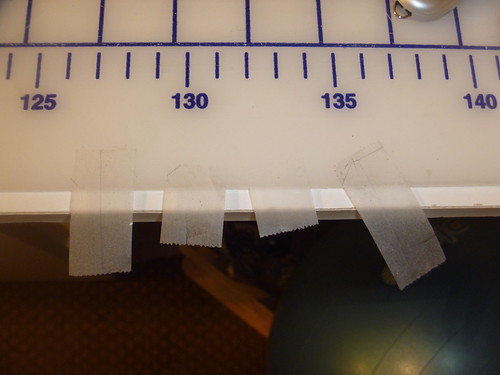
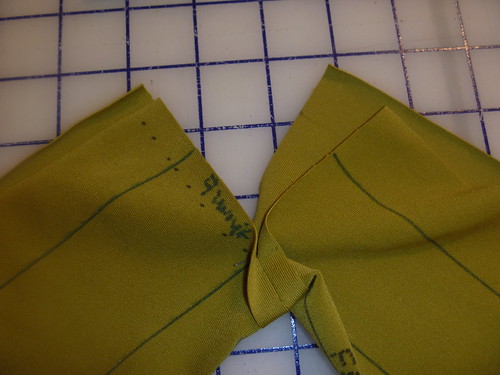
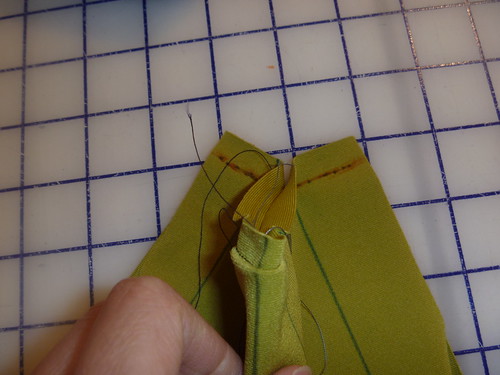
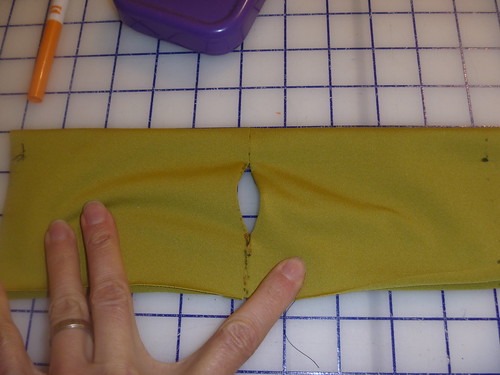
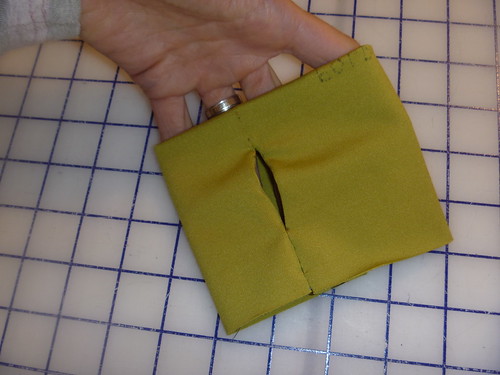
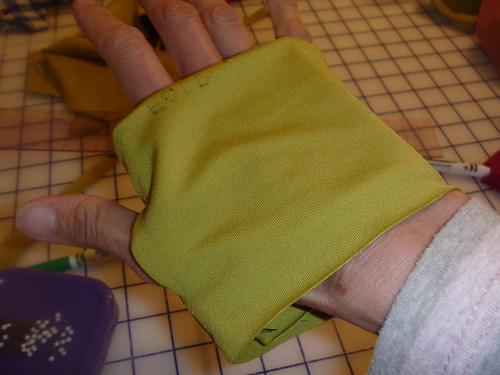
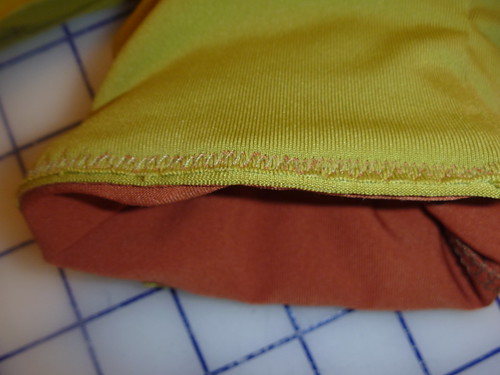
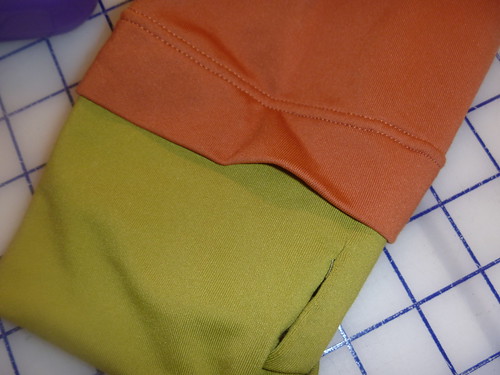
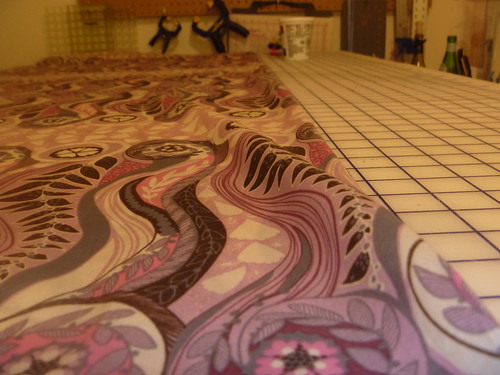
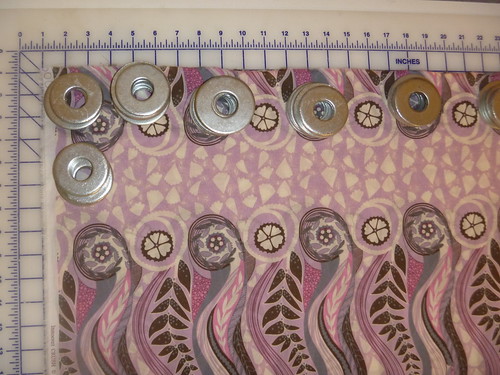
This series of pictures shows wrinkles in the stable fabric that I am trying to smooth out by sliding the selvages over each other. Ultimately for this fabric, I had to rip the weft edge, line it up on the cutting grid, weight it and pull the other side until everything line up. It took a little while, but the results were well worth it. The third picture shows pulling a thread. The pulled thread marks the location to cut along the cross-grain.

Getting true

Line up weft and salvage

Pulling a thread

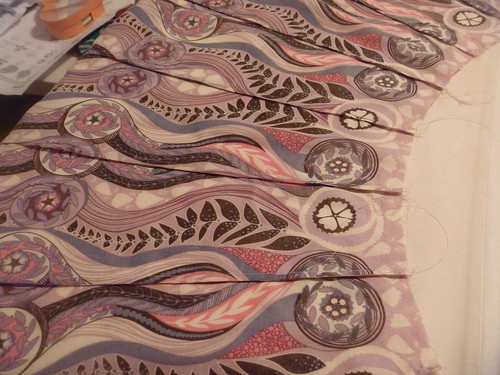
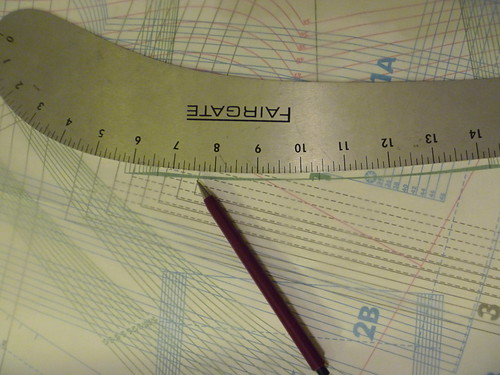
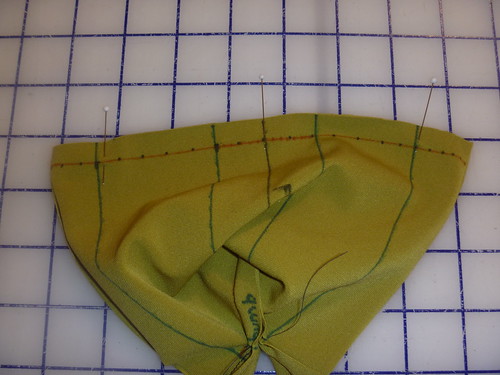
After spending the time trueing up the fabric, it is worth spending a little more time placing the pattern on the grain of the fabric. I usually start out with a weight on one corner and measure to the selvage in multiple locations along the grain line of the pattern.

Placing pattern on grain

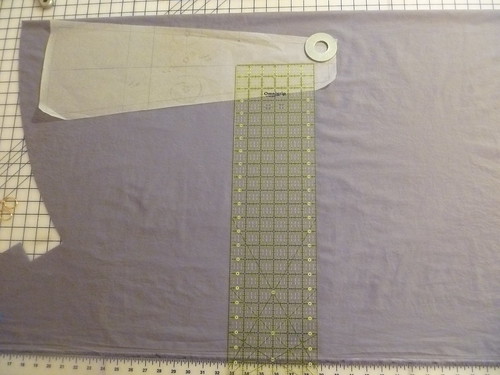
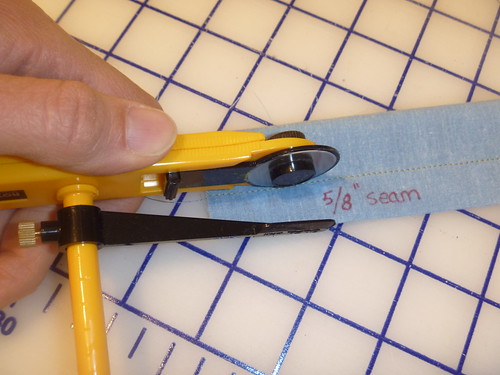
When using the rotary cutter, it helps to keep a little bit of tension on the fabric behind the rotary cuttter. Essentially, just holding the fabric down behind the cutter to keep the fabric from getting bunched up in front of the cutter or pulling on the fabric a little bit. It is easier to do this with lots of weight on the pattern and fabric.

Weighting pattern on the fold

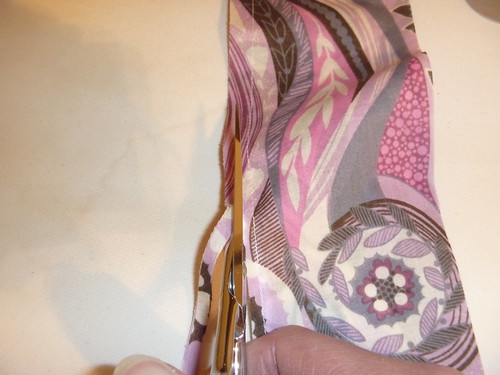
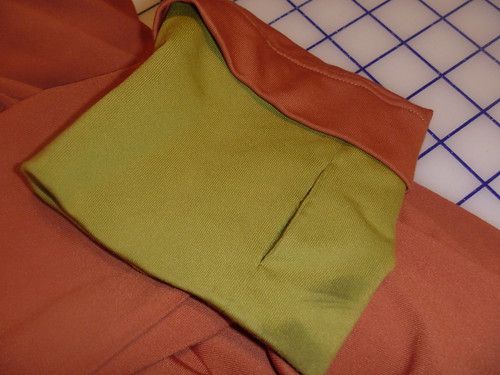
When I use the traced patterns, I find many advantages for marking the construction/seam lines to get a much more accurately sewn garment. The tic marks that I carry through the seam allowance get clipped with a 1-2 mm cut. Just enough to be able to line up the edges. A lot of patterns have notchess that are difficult to cut with a rotary cutter and require a lot of fabric adjusting to cut. I don't do that anymore and have just replaced the notch cutting with a little clip. Sometimes I also mark the location on the seam line where these tic marks are with the a water soluable fabric marker. In addition, I mark with a water soluable marker corners where seams come together. This helps make up for my inaccuracies when I cut the pattern out. Areas around the neck line, shoulder seams, and collars are highly sensitive to matching the sewing lines and small errors in these locations are usually visible. To make these marks on the seam line, prior to lifting the weights, I place pins perpendicular to the fabric through all the layers of the fabric. When I remove the weights, I mark the location where the pins go through on the fabric, usually on the right side, but as long as one side is marked the location can be found.

Marking and clipping

Marking fabric

Tuesday, April 26, 2011

Tracing those crazy patterns

Tracing patterns can be tedious and time consuming. There are many ways to do this and definitely more than one right way. This is the way that I currently do this. My methods have evolved and changed as I see or read about how others do this.

Below are my favorite tracing and for lack of a better term "project prep tools". The one thing that is not included in the picture is a huge role of tracing paper about 24 1/5 inches wide. For most projects, the simple tracing paper works fabulously and is easy to see through.

tools

Using the Ottobre patterns, the sheet letter and color are identified in the directions. Numbers along the bottom of the sheet in the desired color mark the location of the pieces on the sheet. I reference the directions a lot to match the shape of the piece I am tracing.

Once I locate the pattern piece, I cover it with the tracing paper. Because I am miserly, I am careful about where I locate the tracing paper to save room for other pattern pieces thereby conserving tracing paper. WATCH OUT when you do this so that you preserve enough space between pattern pieces for the seam allowance (x2) or any miserly attempts are lost.

Notice the blue Scotch tape. If you have never used Removable Scotch Tape before prepare yourself because it is dreamy. I am once again a conservationalist and use pieces over and over again. (Because small pieces of tape line my studio, they tend to stick to my clothes when I don't realize it. The hitch-hikers have found their way to my office where I now have a small stash of removeable tape.)

removable tape

saved removable tape

When tracing straight lines I use the straight edge clear ruler. This helps me follow the line of the size I am tracing. Because most lines are actually curved, I couldn't live without my French curve.

Tracing straight

Tracing curves

Every pattern piece has a grain line. Do not untape the tracing paper until the grain line is traced (with the straight ruler). Check the magazine or directions for any other marks on the pattern piece before removing the removable tape. Marks that show as tics I trace with a ruler extending through the seam allowance (even though the seam allowance isn't marked yet). Pattern pieces that are cut on the fold, I leave an extra inch or two of paper extending past the fold line. This way when I cut the fabric, I can accurately place the fold line and weight it.

labeling pattern

Leaving extra paper on fold line


Generally, I trace all of the pieces, label them, then use the most amazing tool (Removable Rotary Guide Arm [RRGA])- to cut the pieces out with the seam allowance. (The only place that I have found this tool - RRGA - for sale is at Charlie's E-Z Mat Cutters http://www.matandquiltcutters.com/). Previously, I measured the seam allowance every inch or two with the small clear ruler then connected the dots using the curved ruler.

Depending on what I am sewing, the fabric etc... I vary the seam width. If I am sewing woven fabric for an adult, I use a 5/8" seam allowance. If I am sewing for a young person (less than 5), I will often use a 3/8" seam allowance. I have started to keep samples on my peg board of swatches with different seam allowances. This makes adjusting the seam allowance with the RRGA easier especially when I am sewing seams on the serger.

Setting seam allowance

Once I have the seam allowance set on the RRGA, I place the black arm on my pencil line and the blade on the outside of the pattern piece to cut the paper.

Please let me know if you have any questions or something doesn't make sense. Hopefully, I can clear it up.

Monday, April 11, 2011

Thumb cuff

Please be patient with me, although I read a few zillion blogs daily, I have never attempted to actually post one or much of anything online.  If this tutorial for thumb cuffs doesn't make any sense, feel free to let me know.  I had forgotten how tricky this is so I took lots of pictures to help explain it.

Here is where we are going:

End

1) To start with you will need to know how wide you want the cuff (distance around the wrist). How long the cuff should extend down the hand.  How much space to leave for the thumb.  In this example, I saved two inches for the thumb hole.  The cuff should also be long enough to extend over the hand and attach to the end of the sleeve plus the hem.  You can leave extra length and cut it off when you attach it to the sleeve.

2)The cuff will be made using two identical pieces. To get the size of each piece: Cross grain direction - take half of the circumference + seam allowances on both sides; Grain direction - twice the length from the finshed hem location of the sleeve to where you want the cuff to rest on your hand. Be prepared to do at least one practice cuff.

Thumb hole

3) This one is shown where the thumb hole will be and the fold line marks the end of the cuff.


You may not want to mark it up as much as I have here, but good marking will help a lot.


cut and mark two halves of the cuff


4) With right sides of the two halves together, on one side, sew the center of the cuff together between thumb holes.


sew centerthumb cuff 010
4) Fold along the fold line, right sides together. Stitch the thumb holes together on each of the separate halves.

fold on fold line right sides togethere

sew thumb hole on each half separately right sides together

6) Turn the cuff right side out through the tunnel between the fold and the thumb seams.
turn right side out

7) With right sides together sew from the end of the thumb hole (which isn't a hole right now) to the end of the cuff on both halves. Shown in orange.

sew last ends right side together

8) Yeah! Hopefully it worked!
right sides together with thumb hole

9) With right sides together, sew the other side of the cuff the whole way. The fold will need to be unfolded. Marked in orange.

sew other side right sides toghether

10) Turn the right side out again and hopefully, you have something that looks like this (and probably neater).

Yeah!  It worked.

thumb cuff 024

11) Attaching the cuff to the sleeve is kind of interesting. I machine basted the location of the hem fold on the sleeve. Sew the cuff to the sleeve so that it lies flat when the hem is folded up. I would recommend basting this so that you can make sure that the thumb hole is aligned properly. Fold the hem up and use a cover stitch or double needle to sew the cuff and hem in place. I think I turned the whole sleeve inside out so that I was stitching inside the sleeve on the right side of the fabric. It was like sewing inside of a tunnel, but I took my time and it came out ok.

thumb cuff 025

You can see two sets of stitiching here. One is attaching the cuff to the end of the sleeve and the other is the double needle stitching from the right side.

thumb cuff 026

Here is the finished cuff.